Toyota GR Corolla Forum - Ownership Discussion banner

Its Just a Corolla build...

17K views 74 replies 15 participants last post by  kingofthehill29  
#1 · (Edited)
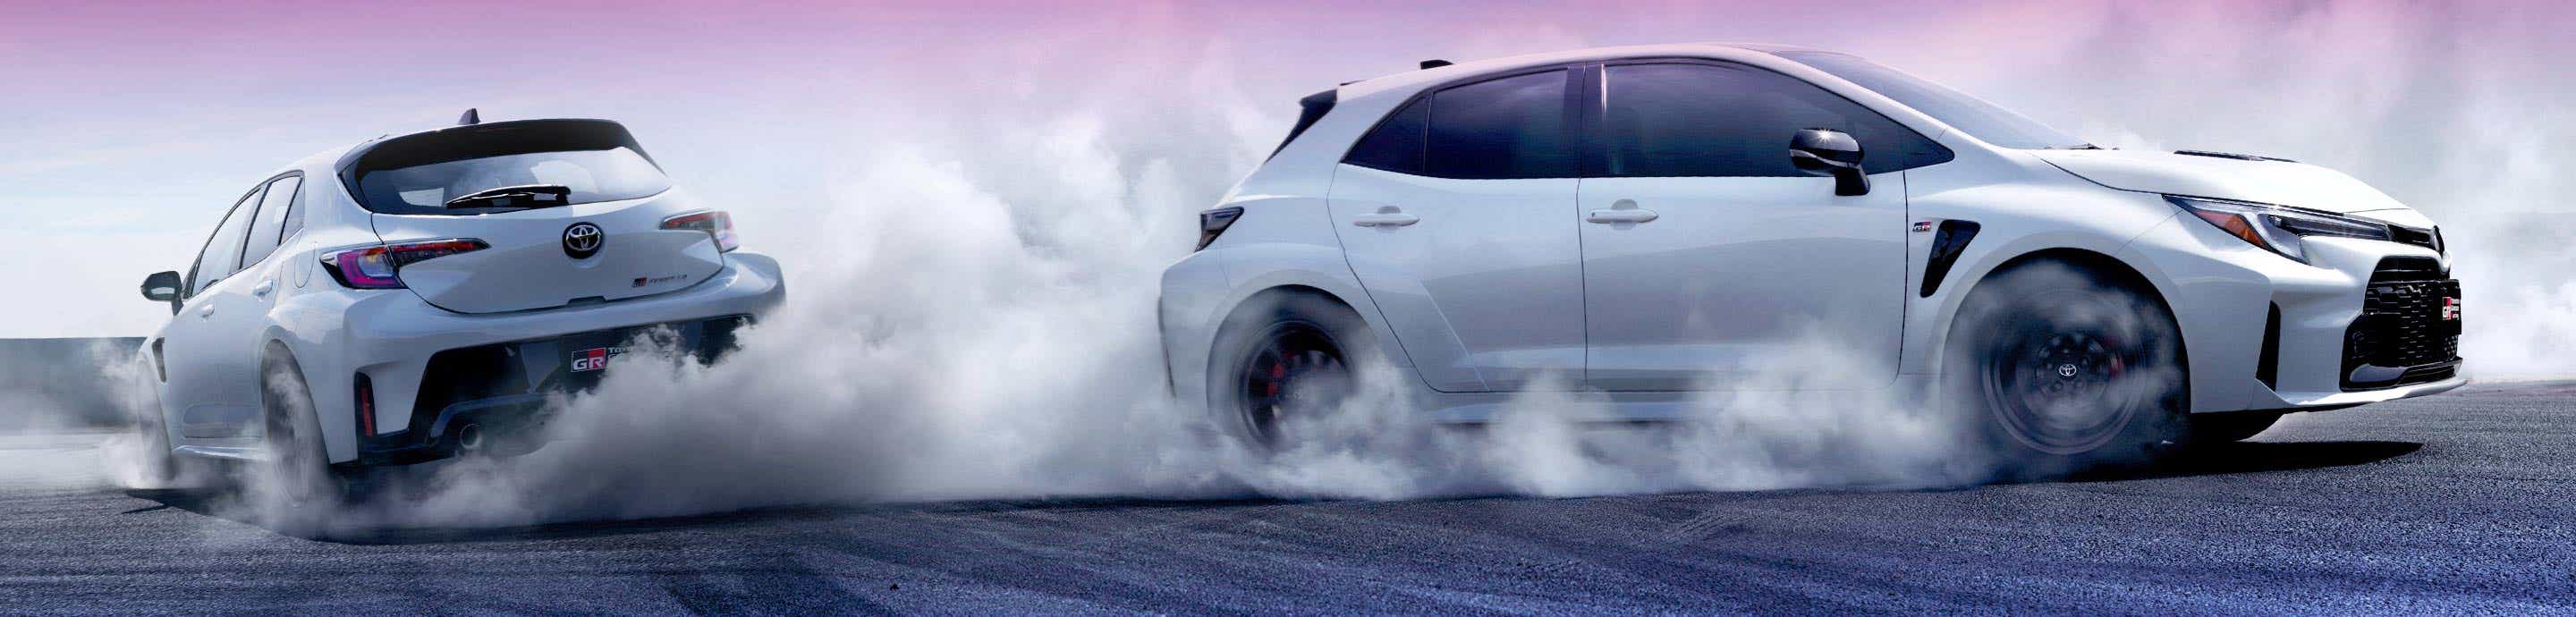
I decided to go ahead and create a build thread for my 2024 GR Corolla Premium to document it. The overall goal is to increase the performance of the vehicle without much compromise to daily drivability. I have been tracking the car and am planning to continue doing so for the foreseeable future. I am trying to be thoughtful when deciding what mods to install, does it improve power, decrease weight, or improve handling? I am trying to check off one of these questions with a yes before moving forward with a mod. Also I am trying to keep it low-key (kinda a sleeper, most people I have met think it is just a Corolla), one of the reasons I do not plan to install a Seibon carbon hood, instead of a stock CE hood.

Image


I didn't wan to make to many changes before I first couple of track days, I kept it stock for my first two track events. I was planning to keep it stock for my third one, later this month but moved up my timeline when my Limit+1 downpipe was delivered much sooner than anticipated. I was planning to upgrade Downpipe, Intercooler, and install a catback then get the car tuned. Decided I will have it dynotuned (after my brother had his civic dynotuned). (Dyno tune completed on 7/18/2024)

After seeing the video posted by Stratified (see this thread) I also decided to get a cold air intake before tuning. I was going to get the K&N but ended up getting the SXTH. Now my tune is scheduled for next week then right after getting it tuned I will be headed to the track for my third track event.

I have been weighing parts I removed and the parts that replaced them and tracking the info in a spreadsheet to try and reduce the overall weight of the car.

As of 7/6/2025 the net weight reduction is: 6.87 lbs (added a bit of weight with the hitch rack, Diffuser, and side skirts).

Image

Image


Image


Here is a list of all the mods I have completed as of 1/23/2025, I plan to revise this as things get changed and upgrades:

Engine/Performance Mods:
  • Limit+1 Downpipe
  • OTL 2in Race Series Intercooler
  • Off the Line Performance Chargepipes
  • SXTH Cold Air Intake
  • RacerX shifter Bearings
  • DeltaX Motorsport Pitch Mount, 60A Bushing
  • Verus Engineering Master Cylinder Support Bracket
  • Verus Engineering Throttle Pedal Spacer
  • Motul RBF 660 Brake Fluid
  • Limit+1 x Boosted Performance Tune:
    • 93 Octane tune: 293 whp, 294 wheel torque
    • E50 Tune: 318 whp, 340 wheel torque
  • Aftermarket Xclutch Stage 1 clutch kit - Supports up to 410 ft*lb of torque (required for e50 tune; Clutch slipped on that tune at high load and high RPM)
  • HKS Hypermax R coilovers due to the camber being adjustable from the wheel well
  • RacerX Rear Carbon brace
  • RK Titanium side exit - Drones slightly less than the center exit.
  • Paragon Front Brake rotors

Interior:

Exterior:
  • Morizo Rear Wiper Delete
  • White Toyota Logos overlays
  • Debadged
  • CE Rear Spoiler (dealer installed)
  • GR Four Inlay Decals
  • CE Inspired Rocker panel Stripe
  • Apex Wheels:
    • 245/40R18 Conti. Extreme Contact Sport02 Tires
    • Professional Awesome Racing Ti Conical Lug Nuts
    • ARP Extended Wheel Studs
  • OEM Circuit Edition Hood (painted by Revemoto) - Revemoto Review
  • Curt 1-1/4" hitch

Track Only:
  • EBC RP1 brake Pads
  • Elig Ti Brake Pad Shims
  • Cusco Front and Rear Towhooks (currently installed but plan to start removing after track days)

Removed Mods:
  • CUSCO Pedal Cover (no longer needed due to the Verus Eng. pedal spacer)
  • Turbosmart Plumb Back valve (was getting really bad turbo flutter and no blow off noises like the stock valve, unsure if that was normal or if the valve was bad and not opening properly; decided it wasn't worth the risk since I don't know enough about turbo cars and how this could effect the reliability)
  • Velossa Tech Ram Air Intake (the one compatible with the SXTH CAI); Didn't like the fitment, due to the overly thick plastic it it narrowed down a lot on the inside creating a choke point/bottle-neck and I am not convinced this will increase the airflow to the airbox inlet (plus the weight is about twice the stock scoop.
  • SXTH Turbo Inlet Pipe - Silicon seal melted
  • RK Titanium Exhaust, Street with Center Exit - Removed due to it being too loud for daily driving; tone is great and this is a good option for track use
  • HKS LegalMax Catback - removed because I preferred the weight savings of the RK ti system and was planning on addin a hitch rack.
  • RacerX FMIC - removed due to heat soak and design flaw that nearly caused the endtank to fail.

Future Planned Mods:
  • Rear Sway Bar
  • Whiteline Rear Camber Arms
  • Whiteline Rear Toe Links
  • CSF Aluminum Radiator
 
#5 · (Edited)
I just wanted to post some info about my previous track days.

Hedge Hollow May 18, 2024:

I did my complimentary GR experience at Hedge Hollow in May, it was a blast. No other GR corollas were there (although several had signed up). In the HPDE GR group there was 2 86's and a GR Supra. I did get some footage of the track and was able to get a few good pictures. Had car in expert mode 50/50 for 3 - 20 minute sessions. No AWD overheat. Ambient temps were low 90s. I also had the tires squealing through most of the turns.

Image

Image

Image

Image

Image


Hallett Motor Racing Circuit June 8, 2024:

I did my second track event at Hallett in Oklahoma. I paid for this out of pocket but used the GR experience login page to sign up. It was a back door to get on the track since they were not offering a HPDE 1 at the track. Instructors seemed surprised they were allowing the GR experience on the track. This track doesn't look as difficult on paper as Hedge Hollow but it was definitely a lot more difficult to drive and the track was very narrow. It was just as fun and I had the most fun in my last session of the day. I had 4 sessions, in the third session I did go off track. I did get to do a ride along with my instructor in his S2k between session 3 and 4. After that session 4 was the best run I had all day.

I did get the overheat on 2 of 4 of my sessions ( each session was 25 minutes). Was 94 - 96 F and very humid when my two overheats occurred. The first one was at the end of my third session (25 minute session) and I was in 50-50. On the 4th and final session it was around just after the halfway point. I was in 60-40 and just continued to drive it hard. Car handles well in the front wheel drive mode. Also Peak oil temp I noticed on car was 261F, it may have gotten a little hotter but that was towards the end of my last sessions. Also there were 2 other GR corollas there that had the AWD overheat. I think one or two of the other GR corollas didn’t hit the overheat. In our run group one GR86 and one GRC also boiled their brake fluid. Decided I needed to make sure I change my fluid before my next track day (Which I have already completed as of now).

Image

Image

Image

Image

Image


#6 · (Edited)
I got my exhaust from RK titanium today, and the install went fairly quick. I did install the exhaust valve using the OTL mount instead of the Titanium L bracket provided, it weighs more but I think it is more secure and a better option for OEM+ mods.
Image


I weighed a the parts today to verify the weight savings:
  • Stock exhaust system (plus extra hangers including passenger side hanger bracket; Excludes the Exhaust valve and its associated hardware) weighed: 33.28 lbs
  • RK titanium Signature Center Exit with the Helmholtz resonator (plus its additional hardware): 11.24 lbs
  • Stock Exhaust valve and the mounting hardware: 1.13 lb (exhaust valve 9.5 oz / mounting bracket with hardware 8.6 oz)
  • OTL exhaust valve mounting relocation bracket: 0.44 lb (or 7.1 oz)
Weight reduction for going to the RK titanium exhaust is 22.04 lbs. By using the OTL relocation bracket it adds an additional reduction of 0.19 lb. Total weight reduction is 22.23 lbs for the install.

The exhaust it has a great tone but is loud (especially when cold), I also have it paired with the Limit+1 downpipe so that is definitely making it louder. I did do a start without the catback (curiosity killed the cat; but satisfaction brought him back) and I am surprised how loud this car is with no muffler. Now the car is ready to be tuned next week, going to drive it to Chicago to Limit+1 for a dyno tune. Excited to attempt my first road trip in this car. Only hesitation is the lack of proper spare tire.

Image

Image


Image
 
#7 ·
Made a quick video of the exhaust sound, wish I did this with my phone for completely stock exhaust for a good comparison. It should be noted this is a warm start, engine was fully warmed up, it is a lot louder on a cold start.

 
#12 ·
I had to make some adjustments to the muffler this morning. It is sitting much closer to the bumper and I am liking the location much better.

 
  • Like
Reactions: Carl
#14 · (Edited)
My RK Ti exhaust keeps coming loose. I'm trying a new clamp at the muffler (as it seems to be the one that keeps slipping). I also added a second exhaust hanger bushing to limit the vibrations and hopefully help, I plan to buy better bushings in the future (possibly Remark Bushings). For the time I am using the stock Toyota as my second but it is almost too wide for the hanger I don't see it coming off though since it took a lot of time and effort/force to get it on there in the first place. Seems to have helped a bit so far but I will keep an eye on it. I also readjusted it while I was making the changes and got it tucked up under the bumper better. I did add my cargo cover back to the car and it seems to help absorb some of the exhaust drone and has made it even more bearable in the car.

Image
Image

Image
Image


Tuning update:

I got my car dyno tunes at Limit+1. I did as many supporting mods as I could before dyno tuning to increase airflow in and out of engine. SXTH intake, OTL Charge Pipes, RacerX FMIC, Limit+1 Downpipe, and RK ti catback. The baseline run with no tuning 297 whp and 280 wheel torque on 93 oct. It looks like bolt ons can improve HP/Torque without tuning.

I had them tune it for 93 octane and e50. Overall it was a great experience, I was hoping for 300 whp on pump gas and it was close. After driving it I can say it made the power more useable and boost starts building below 3000 rpm and there is significantly less boost lag between shifts (it is non-existent when flat-foot shifting). The exhaust drone on the interstate is in a smaller RPM zone so it make the full exhaust more bearable. Still debating on if I want to get rid of the RK Ti Catback., waiting to see if they release a dual system and if I can just buy the mufflers to convert mine to it.

Image


My 93 octane tune produces 293 whp and 294 wheel torque. I did loose a little peak HP but gained a lot of wheel torque with the tuning. The E50 tune is 318 whp and 340 wheel torque. Both have much improved throttle response and when on E50 this car is insanely quick, but I will need to a better clutch. I had it slip on my at high RPMs under full throttle once. Clutch still feels good but the e50 tune is near the max torque it can support. Now I need to decide when I tackle the clutch if I want to do it myself or if I will try and find a trust worthy shop with experience with these cars to have it done.

I do wish that my 93 and e50 tunes were map switching enabled, unfortunately I need to reflash my tune every time I want to change fuel types. I will check and see if I can get them to make to use map switching if/when I need to update my tune. Re-flashing makes me nervous, since it will most often happen away from home (at a gas station and possibly on a road trip).

Image
Image
 
  • Like
Reactions: lmike.grc
#15 · (Edited)
Ozarks International Raceway, July 20-21, 2024:

The car performed great for the weekend. Overall the temperature both days was in the mid 80s, which was exceptionally cool for July. I was expecting 95+ and prepared for those temps by installing Ti brake shims and EBC RP1 Track pads. I had also changed brake fluid out previously to Motul RBF 660 (my instructor recommends next time going with the 600, he said it last longer).

The first day went great overall, did 4 20 minute sessions with class in between. It was mostly learning the track. NASA was doing the lead-Follow method so me and the other student I was paired with (also in a GR Corolla) were gridded in 11 & 12 out of 21. Towards the last two sessions we were catching several of the other groups and getting stuck in traffic on the track, this did frustrate our instructor. Getting stuck in the lap traffic did help me is session 3 & 4 really work on hitting the raceline at a slower pace and set me up better for my check ride. Overall on first day I did not see any temps for oil above 240F and the rear diff did not overheat at all. I also ran at least one session in 60:40, 50:50, and 30:70. Can feel the rotation difference between 60:40 and 30:70, I do like 60:40 better because it felt like I could start throttling it more in the middle of the turn as I apex'd.

Here is a lead-Follow Lap from session 2:

On the second day my instructor got us moved up in the grid, we were now in 7 & 8, right behind the C8 Corvette and BMW M4 Comp (he wanted us ahead of them because we caught up to them previously in sessions 3 & 4). In the first session (session 5) we caught traffic quickly and got a point-by from the BMW and Corvette. This gave us some clear track for a while until we caught more traffic at the end of the session. I believe I ran the car is 60:40 for all of my sessions except one which I did in 50:50 (session 7 IIRC). My fastest laps of the weekend were in session 7 (session 3 day 2), before that I was running 3:40 to 4:00 lap times. In session three I hit approximately 3:30 for at least 2 laps. I plan to post that footage later on since I am still editing it. Again no overheating issues with the diff and the highest engine oil temp I saw was 231F. I could go lower on my tire pressures in the future as well. It should be noted the 2nd day was hotter and I pushed the car harder.

Here is session 6 (2nd session of 2nd day), we had no traffic to deal with this time, I ended up in front of the instructor and took a slow outlap because I didn't want to get in trouble for leaving the instructor car, the video begins as we get to end of outlap and I give point-by to the instructor car.

Here is session 7 of 8, this was overall my fastest session of the day. My best two laps were roughly 3:30 to 3:31. I really hope to improve and from watching the videos I took I think I found a few areas where I can gain some time. I can't wait to go back in October.


Overall the track was great and I can't wait to go back in October. I drove the entire track in 3rd and 4th gear, there were a couple spots I could hit 5th but I was not wanting to carry that much speed yet. The tune made the car have a bit more power low end and it allowed me to not need to downshift as much going into some of the tighter turns. I did get moved up to HPDE 2 and am approved to drive solo. Next time there are a few things I want to try. I want to hit 5th in the rollercoaster section then wait until turn 11 to downshift back to 4th. I also want to try a 2nd gear downshift in turn 18 to try and get a little more entry speed out of the turn into turn 19 and the straight before turn 1.
 
#16 · (Edited)
I installed my new tires and wheels. I got the Bronze Apex VS-5RS and the Continental ExtremeContact Sport02 in the 245/40R18 size. These wheels look amazing. I did test fit the wheels ahead before doing the extended studs and I got 4.5 turns in the front and 5 turns in the rear. Definitely needed to go with the extended studs.

Image


After researching I decided to go with the ARP studs, which would require removal of the rear axle bearing. The front was easy enough all I needed to do was bend the brake shroud, which I didn't like doing but after dealing with the axle nut on the rear I decided I was best off taking the least invasive route. As stated I went with the ARP wheel studs, I also bought Professional Awesome Titanium Lug Nuts, and 2x replacement Toyota Axle nuts.

This installation took about 6 hours to complete, I was expecting 3ish hours. I foolishly decided to do this during the week rather than weight for the weekend, since the last of the tools I needed showed up from amazon and I have been waiting to do this ever since I ordered the wheels in April. The tools I ordered were the lug nut installation tool, Toyota 30mm axle nut removal tool (comes with the tool to remove the stake) and a axle nut staking tool.

De-staking the axle nut was the most stressful part. Need take your time to make sure that the staked portion does not touch the threads when unbolting. Removal is easier with an impact. Need an impact to install studs as well, I would not recommend doing studs yourself if you do not have access to an impact wrench. The next most difficult part is getting to the 4 bolts attaching the hub assembly, I had to get creative with extensions, including use of a wobble extension.

Torque specs:
  • Rear Axle Hub Bolts, 4 per side: 66 ft*lbs
  • Brake Caliper bolts, Front and Rear, 2 per wheel: 79 ft*lbs
  • Rear Axle nuts: 159 ft*lbs
Image
Image

Image

Image

Image

Image

Image


I did weigh everything before install and weighed all of the stock parts as well:
  • ARP Studs per set of 5: 0.70 lb
  • Professional Awesome Titanium Lug nuts per set of 20: 0.88 lb
  • Weight of each wheel and tire: (41.40, 41.10, 41.08, 41.40) = AVG of 41.245
The Weights of the stock parts:
  • Front Studs per set of 5: 0.47 lb
  • Rear Studs per set of 5: 0.53 lb
  • Stock Lug nuts per set of 5: 0.76 lb
  • Weight of each wheel and tire: (42.86, 42.82, 43.22, 43.18) = AVG of 43.02
Total weight savings for this install was approximately: 8.44 lbs of rotating mass.

 
#18 ·
I installed my new tires and wheels. I got the Bronze Apex VS-5RS and the Continental ExtremeContact Sport02 in the 245/40R18 size. These wheels look amazing. I did test fit the wheels ahead before doing the extended studs and I got 4.5 turns in the front and 5 turns in the rear. Definitely needed to go with the extended studs.

View attachment 28735

After researching I decided to go with the ARP studs, which would require removal of the rear axle bearing. The front was easy enough all I needed to do was bend the brake shroud, which I didn't like doing but after dealing with the axle nut on the rear I decided I was best off taking the least invasive route. As stated I went with the ARP wheel studs, I also bought Professional Awesome Titanium Lug Nuts, and 2x replacement Toyota Axle nuts.

This installation took about 6 hours to complete, I was expecting 3ish hours. I foolishly decided to do this during the week rather than weight for the weekend, since the last of the tools I needed showed up from amazon and I have been waiting to do this ever since I ordered the wheels in April. The tools I ordered were the lug nut installation tool, Toyota 30mm axle nut removal tool (comes with the tool to remove the stake) and a axle nut staking tool.

De-staking the axle nut was the most stressful part. Need take your time to make sure that the staked portion does not touch the threads when unbolting. Removal is easier with an impact. Need an impact to install studs as well, I would not recommend doing studs yourself if you do not have access to an impact wrench. The next most difficult part is getting to the 4 bolts attaching the hub assembly, I had to get creative with extensions, including use of a wobble extension.

Torque specs:
  • Rear Axle Hub Bolts, 4 per side: 66 ft*lbs
  • Brake Caliper bolts, Front and Rear, 2 per wheel: 79 ft*lbs
  • Rear Axle nuts: 159 ft*lbs
View attachment 28737 View attachment 28738
View attachment 28739
View attachment 28740
View attachment 28741
View attachment 28742
View attachment 28743

I did weigh everything before install and weighed all of the stock parts as well:
  • ARP Studs per set of 5: 0.70 lb
  • Professional Awesome Titanium Lug nuts per set of 20: 0.88 lb
  • Weight of each wheel and tire: (41.40, 41.10, 41.08, 41.40) = AVG of 41.245
The Weights of the stock parts:
  • Front Studs per set of 5: 0.47 lb
  • Rear Studs per set of 5: 0.53 lb
  • Stock Lug nuts per set of 5: 0.76 lb
  • Weight of each wheel and tire: (42.86, 42.82, 43.22, 43.18) = AVG of 43.02
Total weight savings for this install was approximately: 8.44 lbs of rotating mass.
That looks great! I've been looking at the VS-5RS for mine as well. Did you stick with the stock width or go wider?
 
#17 ·
Qi Charger Delete:
I found a really good video that explains how to replace the Qi wireless charger, it helps a lot. Only thing to note the guy has you take off the shift know and reverse lockout, there is no need to do this step for teplacing the Qi charger pad. I did not do that step.


I replaced the charger with Toyota P/N 58839-12100-C0 (model for cars with seat warmers) nets a weight reduction of 12.5 oz (0.78 lbs). For me that seems like a win, no need for Qi charger, it is just dead weight. It should be noted it appears that this part has been discontinued so if you want one best get it sooner than later. I like that is utilizes the space better giving more room, plus I keep having my phone slide off of the qi charger (since that is where I like to set it when I plug it in for wired carplay.

Image


RK Titanium Exhaust Update:
I have a bit of an update on the RK exhaust. So far it has not been backing out since I replaced the clamp and installed the second (stock Toyota bushing) on the hanger. I bought some remark bushings and I added one of the bushings on my exhaust to the hanger at the muffler. These bushings are much stiffer than the stock bushings and the additional RK supplied one. This should significantly reduce vibrations and help prevent the muffler from popping off. As for in cabin noise I reinstalled the rear cargo cover and that has significantly reduced the drone noise and it is now bearable to drive on interstate (and quite enjoyable to cruise around town. That cover does a good job absorbing the noise in the rear. I removed it due to not really needing it and it was a simple way to drop off weight from the car but now I need it so I will just have to deal with it. I will remove it for track day though.

On a side note when the engine isn't up to 180 F coolant temp the exhaust does produce a slight tin noise when accelerating at about 2500 - 4000 rpm. I did crawl under the car and noticed that the flange where it attaches to the downpipe has some carbon build up. I replaced the donut gasket with a new one and it still has some carbon build up. I think it is leaking and as the exhaust heats up (I believe the SS downpipe expands more than the titanium) it then seals. I have an idea on how to remedy this, I will post more once I test my solution if it is successful.
 
  • Like
Reactions: Rdrcr
#21 ·
Yes! Ok, this is the exact setup I am looking at even down to the color, and I see you share my passion for weight reduction. So I have a question: According to the Apex Website those wheels should weigh about 16.9lbs, and according to others on this forum the stock wheels weigh ~22.4lbs. That should be about 5.5lbs off per corner. Obviously cutting against that is the longer studs (~+0.2lbs per corner) and wider tires (.78lbs per tires according to the America's Tire website). This would net you about 4.5lbs per corner. Obviously the reality on the ground is different because you're seeing like half the reduction. Do you have any ideas as to where that weight might be coming from?
I only weighed two of the wheels. They weighed 17.2 lbs and 16.94 lbs. I meant to weigh the others but forgot to do so before going to the tire shop. I did weigh one of the tires and got 23.8 lbs. (tire rack provides a 23 lb weight listing on their website). After seeing the how much they vary from website listed weights I decided to weigh wheels/tire as a package and use that to determine the weight reduction for my situation. My scale may be slightly off to but I am trying to weigh everything on the same scale to give more consistency to my calculations. I would say majority of the weight is coming from the tires. I knew the tires would be heavier than the stock tires and molded parts tend to vary a lot more in weight than machined parts.
 
  • Like
Reactions: Mr. Toad
#23 · (Edited)
A lot has developed, I was told at work (my department only) is mandatory work from home for a minimum of 3 weeks, the executives need to borrow our cubicles while their office space is remodeled. So I immediately thought this would give me a great opportunity to take my car out of commission and install as many of my planned upgrades as possible. I immediately started ordering parts. Now I can spend lunch break working on my projects, and no need to use PTO to sign for packages. I have already saved the money for these projects, I just didn't order anything before now because I don't like to get things until I am ready to start the project.
  • Xclutch Kit
  • Hypermax R Coilovers
  • SXTH Turbo Inlet Pipe kit
  • RacerX Carbon Rear support bar
  • Painted CE hood (actually ordered in June; is scheduled for delivery during my project/mandatory work from home period)
Lots of upgrades happening. I am going to try and post updates all at once and I want to put a basic guide together for the clutch install to help others who may be considering doing it themselves. And yes I am changing the clutch with jackstands in my garage. At this moment I am reassembling the car and the transmission is back in it. I have done 95% of the work completely solo, had to get help with separating the transmission from the engine, it is a tight fit, realigning the transmission with the engine (also very difficult due to the angle and the tight fit), and bleeding the clutch (which only took 10 minutes and was far easier than I expected).

I did weigh stock components and the replacement parts, here is a list of the weights of everything (will update as I get the final weights):
  • Xclutch (pressure plate and clutch disc): 12.68 lb; Stock: 13.42 lb => weight reduction: 0.74 lb
  • Hypermax Coilovers (front): 34.36; Stock: 43.04 lb => weight reduction: 8.68
  • Hypermax Coilovers (Rear): 25.04 lb; Stock: 19.88 lb => Weight Increase: 5.16 lb
    • Overall Coilovers dropped weight 3.52 lb and transferred weight from front to rear.
  • SXTH Turbo Inlet Pipe kit: 2.86 lb; Stock: 2.82 => 0.04 lb reduction (not significant at all but should allow engine to breath better.)
  • Racer X rear Carbon Brace: 0.84; Stock: 3.06 lb +=> weight Reduction of 2.22
  • Stock CE painted hood: 16.60 lb; Stock Premium/Core Hood: 15.04 lb => Weight Increase 1.56 lb (looks way cooler and should theoretically help reduce engine compartment temperatures)
Net Weight Reduction for this project: 4.96 lb, and car will handle better and I will be able to use all the power of my E50 tune.
 
  • Like
Reactions: CrazyAirborne
#24 ·
Completed the install of my HKS Hypermax R coilovers (and clutch kit). Super happy with how it came out. The ride height is perfect at the default setting and alignment feels great. I will have an alignment performed next week to verify though. Feels like the car holds the road much better, but doesn't feel harsh. I am really liking the way it handles on the coilovers. While I had the car apart to do all the work I also gave my wheels a thorough cleaning and coated them in wax, hopefully this will make the brake dust come off easier with just high pressure water. Lastly I installed the racerX carbon rear shock brace. I have been eying this for a while and I am super happy with the quality of racerX's parts.


Image


I got a notification that my Circuit edition hood was going to be delivered while I was working on the car. I ended up ordering it from revemoto. The paint match is excellent, my only complaint is the paint quality on the inside of the hood is no where near OEM and there is one chip in the paint at the edge (hardly noticeable) overall I would rate revemoto a 8.25/10. I ordered it on July 9th and it arrived on August 8th, not bad timing wise.

Image


Image

Image
 
  • Like
Reactions: Bryota_GR
#25 · (Edited)
Disclaimer: This is a write-up on the overall process I went through to change the clutch myself. This is not a 100% accurate (meaning I more than likely missed minor or trivial steps.) I do not take responsibility for any issues or damages if anyone decides to change the clutch themselves. The intent is to give an outline of the process, to help others in determining if this is something they are capable of accomplishing themselves.

Image

Clutch Install/Semi-Informal Write-up:


This was probably the 2nd biggest automotive project I have ever attempted. I did it with jackstands in the garage and it took 5 days to do (but I did also do some other work, so I could have probably done just the clutch in 4 days.) I am going to try an outline the steps I took and order as best as possible but once I got into the project I stopped taking notes and pictures. I tend to get hyper focused during projects and forget to take pictures. I installed the Xclutch Stage 1 kit (the one that retains the stock DMF). I also upgraded the bushing for my Delta X motosport pitch mount to the 70a while I was working on the car.

First are the lessons I learned:
  • Remove the d-shaft heat shield and the downpipe from the car before dropping the transmission; they will get in the way during the process.
  • Disconnect the drive shaft; leave shift linkage connected until after the drive shaft is disconnected
  • Removing the steering knuckles is easy (hang brake calipers with bungees); this will make it easier to drop the subframe
  • If you drop the subframe make sure that the steering linkage is disconnected, this can be done from inside the cab in drivers foot well, it is only one 14mm bolt that needs to be disconnected.
  • By dropping the subframe there is no need to remove the transfercase from the transmission.
  • No need to pull drivers side cv axle when dropping the subframe and the car doesn’t need to be as high because you can pull transmission out through the drivers wheel well
  • Drain all fluid from transfer case and transmission before pulling CV axles. This is critical.
Required Consumables (Items that will need to be replaced during the clutch install, I feel like I am missing something but these are the important bits):
  • 2X Axle Nuts - P/N 90080-17238
  • 1 qt 75x-85 GL% Gear Oil (0.49 qt capacity in transfer case)
  • 3 qts. 75W LV GL-4 (2.1 qt qt capacity for transmission)
  • 2X transfer case drain and fill plug gaskets - P/N 12157-10010
  • 2X transmission drain and fill plug gaskets - P/N 90430-A0003
  • Clutch kit of choice
  • Brake Fluid of Choice

To start I disconnected the battery and used bungee cords to hold the rear hatch open (so it wouldn't hit my garage door while on jack stands). My jack stands were set at a height of 21 inches (this seemed like a good height, I could reach most parts in the engine bay and it allowed for enough room to remove the transmission from the wheel well; remember you can change the height until you remove the subframe/lower trans mount). I then removed the air box so that I could gain access to the top of the transmission to disconnect the wire harness that is bolted to it, the shift linkage, the downpipe bracket and the transmission mount (this is the last thing to disconnect before dropping transmission.

Image


Next I started under the car. I disconnected the exhaust, the drive shaft, and the pitch mount. This is a good time to drain the transmission fluid and trans case fluid. Next I removed the wheel axle nut. It helps to disconnect the tie rod end and caliper to get more range of motion. You will also need to remove the two nuts and one bolt at the bottom of the control arm that attach the steering knuckle And unbolt the sway bar endlinks from the strut (Its fine to leave connected the the sway bar). Since I was doing coilovers too I just removed all of the suspension components to make it easier.

Image


Now I removed the passenger cv axle, there is a cast iron support for it that retains the cv axle with a snap ring like retainer. This can be removed with channel locks or pliers. Them there is a bolt sticking out of the bottom that acts like a set screw, this will need to be loosened. Important note: make sure you have drained transmission fluid and transfer case fluid before pulling out the cv axle. If not done this can cause the fluids to mix and require them to be flushed. Now you can carefully pull the cv axle.

Now you can start to drop subframe. Before dropping it make sure to disconnect the connector for the o2 sensor, it is attached in multiple spots. Disconnect the Steering input shaft from in the car and the dust boo can be unclipped from the car from the same area. Now there are two supporting beams that tie the subframe to the front of the chassis, each has 4 bolts that need to be disconnected. The passenger side one also needs to be unbolted from the hot side charge pipe going to the intercooler. Once you verify all these components are disconnected you can drop the subframe, it is attached to the chassis by the 4 bolt locations circled in the image below. This is heavy, use some kind of jack to support and lower it.

Image


Now if not already done make sure the transfer case output shaft heat shield and downpipe are removed from the car Now make sure all electrical connections are disconnected from the transmission, disconnect the slave cylinder, I disconnected it at the lowest point at the front of the transmission. Caution: All of the brake fluid in the Master cylinder reservoir will drain out, make sure not to hit brakes until the master cylinder has been refilled after the clutch has been reconnected. This seemed the easiest way since there was only one bolt attaching the hose at this location. Now go over everything to make sure there is nothing connected to the transmission and this is a good time to disconnect your shifter linkage. Now you can unbolt bell housing bolts. After removing the ones on the bottom side I would recommend getting a trans jack in there to support the transmission while removing the bolts on the top side.

Image


The above diagram shows the locations of all the bellhousing bolts. Bolts labeled A are 17mm and bolts labeled B are 14mm. I also circled the two starter bolts that need to be removed, these are also 14mm. The numbers are the order to tighten the bolts when torquing them during the install. There is a small plastic shield that is on engine side of starter, I would recommend removing this and setting it to the side to prevent from loosing it (easiest to remove once transmission is removed).

Once all the bellhousing bolts are removed you can unbolt the 4 bolts attaching for the transmission mount. Now you can slowly start to lower the transmission and break it free from the engine. Once you have successfully done this thre transmission can be removed from the drivers side wheel well. I would immediately recommend supporting the engine as best as you can so that the engine mount on the passenger side isn’t supporting the entire weight of the engine. I used a jack underneath and an engine strut tower support bar up top.

Image


Image


Image


Image


Image


Image


Overall the stock clutch was still in good shape, only reason I changed it was due to slipping at high RPM and high load on my e50 tune. The ridges in the flywheel and pressure plate are starting to smooth out (this has been well documented that there are ridges from Toyota). The areas that look like hotspots are the higher locations that have started wearing smooth. I did hit the flywheel with a stone and emory cloth to clean it up a bit before mounting the new clutch.


To be continued (reached limit for images)....
 
#26 ·
View attachment 29229
Clutch Install:


This was probably the 2nd biggest automotive project I have ever attempted. I did it with jackstands in the garage and it took 5 days to do (but I did also do some other work, so I could have probably done just the clutch in 4 days.) I am going to try an outline the steps I took and order as best as possible but once I got into the project I stopped taking notes and pictures. I tend to get hyper focused during projects and forget to take pictures. I nstalled the Xclutch Stage 1 kit (the one that retains the stock DMF). I also upgraded the bushing for my Delta X motosport pitch mount to the 70a while I was working on the car.

First are the lessons I learned:
  • Remove the d-shaft heat shield and the downpipe from the car before dropping the transmission; they will get in the way during the process.
  • Disconnect the drive shaft; leave shift linkage connected until after the drive shaft is disconnected
  • Removing the steering knuckles is easy (hang brake calipers with bungees); this will make it easier to drop the subframe
  • If you drop the subframe make sure that the steering linkage is disconnected, this can be done from inside the cab in drivers foot well, it is only one 14mm bolt that needs to be disconnected.
  • By dropping the subframe there is no need to remove the transfercase from the transmission.
  • No need to pull drivers side cv axle when dropping the subframe and the car doesn’t need to be as high because you can pull transmission out through the drivers wheel well
To start I removed the air box so that I could gain access to the top of the transmission to disconnect the wire harness that is bolted to it, the shift linkage, the downpipe bracket and the transmission mount (this is the last thing to disconnect before dropping transmission.

View attachment 29225

Next I started under the car. I disconnected the exhaust, the drive shaft, and the pitch mount. This is a good time to drain the transmission fluid and trans case fluid. Next I removed the wheel axle nut. It helps to disconnect the tierod end and caliper to get more range of motion. You will also need to remove the two nuts and one bolt at the bottom of the control arm that attach the steering knuckle And unbolt the sway bar endlinks from the strut (Its fine to leave connected the the sway bar). Since I was doing coilovers too I just removed all of the suspension components to make it easier.

View attachment 29226


Now I removed the passenger cv axle, there is a cast iron support for it that retains the cv axle with a snap ring like retainer. This can be removed with channel locks or pliers. Them there is a bolt sticking out of the bottom that acts like a set screw, this will need to be loosened. Important note: make sure you have drained transmission fluid and transfer case fluid before pulling out the cv axle. If not done this can cause the fluids to mix and require them to be flushed. Now you can carefully pull the cv axle.

Now you can start to drop subframe. Before dropping it make sure to disconnect the connector for the o2 sensor, it is attached in multiple spots. Disconnect the Steering input shaft from in the car and the dust boo can be unclipped from the car from the same area. Now there are two supporting beames that tie the subframe to the fron of the chasis, each has 4 bolts that need to be disconnected. The passenger side one also needs to be unbolted from the hot side charge pipe going to the intercooler. Once you verify all these components are disconnected you can drop the subframe, it is attached to the chassis by the 4 bolt locations circled in the image below. This is heavy, use some kind of jack to support and lower it.

View attachment 29227

Now if not already done make sure the transfer case output shaft heat shield and downpipe are removed from the car Now make sure all electrical connections are disconnected from the transmission, disconnect the slave cylinder, I disconnected it at the loest point at the front of the transmission. This seemed the easiest way since there was only one bolt attaching the hose at this location. Now go over everything to make sure there is nothing connected to the transmission and this is a good time to disconnect your shifter linkage. Now you can unbolt bell housing bolts. After removing the ones on the bottom side I would recommend getting a trans jack in there to support the transmission while removing the bolts on the top side.


Once all the bellhousing bolts are removed you can unbolt the 4 bolts attaching for the transmission mount. Now you can slowly start to lower the transmission and break it free from the engine. Once you have successfully done this thre transmission can be removed from the drivers side wheel well. I would immediately recommend supporting the engine as best as you can so that the engine mount on the passenger side isn’t supporting the entire weight of the engine. I used a jack underneath and an engine strut tower support bar up top.

View attachment 29230

View attachment 29228

View attachment 29229

At this point you have access to the clutch. Once changed you just need to reverse the process to reassemble.

I intend to add more to this post, it is currently a draft in work.
Great write up so far! My 2¢ for the final copy, maybe add torque values to this for when you put everything back together because that’s a lot of bolts and nuts lol
 
#27 · (Edited)
Image


Here is some of the toque specs required during reassembly:

The clutch pressure plate to flywheel toque is 14 ft*lb (the requirement for the Xclutch kit is 26 ft*lb due to grade 10.9 bolts being used). Per the repair manual snug bolt 1 then torque the rest in order, bolt 1 will be torqued when you get to it as bolt 2.
Image


At this point you have access to the clutch. Once changed you just need to reverse the process to reassemble. the overall order for reassembly for me was to get the transmission lined up with the engine then torque the bellhousing bolts followed by the starter bolts. Here is the page from the repair manual on torque order and torque specs. The starter bolts (not shown) are also the same torque at the 14mm bolts labeled (B).
Image


Now the plastic starter cover can be replaced (if removed, it clips into the engine). At this point I used the jack to raise the engine into place and attach the transmission mount in the engine compartment (there is a torque order for these bolts). I did find it easier to access these bolts with my torque wrench by removing the ECU, it is fairly easy to do.

Image

Now I spent time reconnecting all of the wire looms and connectors attached to the transmission, hooked up the hydraulic line for the throw-out bearing and bled the clutch. Next is a good time to reconnect the downpipe (recommend leaving mid pipe off until after re-installing the subframe). you have a lot more clearance to work on getting it installed and better access but it can also be done after installing the subframe.

Image


Installing the subframe was not that difficult, the hardest part of the process was connecting the steering input shaft. Here is a good post to reference on the torque specs for the subframe. I recommend using the jack to raise subframe into place, one it is close then reconnect the steering input shaft and the dust boots. Once complete reinstall the subframe, should have only need to torque 4 bolts, the torque specs are in the linked post at the beginning of this paragraph.

Image


No the two forward subframe supports can be repalced. Both attach to the subframe with 2 14mm bolts and attached to the chassis of the car with another 2 14mm bolts. The passengers side also attaches with 2 bolts to the turbo hotside charge pipe.

Image

At this point you can attach lower engine/trans pitch mount. Install everything loosely. Torque the 4 14mm bolts on the trans mount side first. Then torque the pitch mount to subframe bolt, lastly torque the bolt that attaches the pitch mount to the trans mount.

Image

Image

*image from DeltaX pitch mount install instructions. I added the toyota OEM torque specs where it is different. DeltaX specifies a lower spec due to the addition of the blue locktite.

Next part is to get the drive shaft reinstalled. When I disassembled the driveshaft I unbolted the 4X bolts on the transfer case flange and the 2x bolts supporting the carrier bearing (the heatshield needs to be removed to access those 2 bolts. The nuts for the drive shaft flange torque to 54 ft*l and the carrier bearing bolts torque to 27 ft*lb (be careful to have the spacers/support washer installed in the correct location (between carrier bearing flange and body of car). A diagram can be found in this post by maxg. Now the transfer case output shaft heat shield can be reinstalled, this attaches with 2 bolts torqued to 18 ft*lb.

Once the driveshaft is re-installed finish installing the exhaust midpipe and any heatshields that were removed. Once all that is done the 2 chassis support beams can be replaced, 4 bots on the front one and 8 bolts on the mid one. All 12 bolts torque to 24 ft*lb.

Now the passenger CV axle can be reinstalled (and drivers side if it was removed). Install the bearing support retaining clip first then torque the retaining bolt.

Image
 
  • Like
Reactions: GRunner
#28 · (Edited)
Once this was all completed I started reassembling the front suspension components. Here is a good diagram showing all of the component bolts and their torque specs. the swaybar endlink nut to strut torque spec is not listed the value I found was 55 ft*lb.

Image


At this point I reconnected the shift linkage, made sure I torqued down the downpipe support bracket, reinstalled the ECU, and reinstalled my airfilter assembly. Now I double checked everything made sure I staked the axle nut after torquing and reinstalled the wheels and connected the battery. I test started the car on jack stands to make sure there were no errors (probably not the safest thing to do but I felt comfortable since the jack stands I used were incredibly stable.


Special thanks to these members of the forum, I was able to utilize information they posted to help with researching for changing out my clutch (I also linked the posts for reference):

I intend to add more to this post, it is currently a draft in work. I believe I have everything in here to be a basic guide, I did leave off trivial thins that should be obvious when doing this kind of work. I tried to remember the order I did things as best as possible, I did reorder a few thing that I discovered should have been done at a different point in the process.
 
#31 ·
#32 ·
My clutch should be broken-in by now, Im just over 600 miles on it. Have been doing a lot of city driving and backroads with a lot of stop signs. Once I burn through my current tank of 93 I plan to switch to E50 and give it a good test.

I got my alignment completed and I signed up for my next track day. Planning to go back to Hallett in September. Looking forward to seeing how much better the car will handle along with my improvements from my last track day at OIR.

Image
 
  • Like
Reactions: MSchwartzGR4
#33 · (Edited)
Not a whole lot new, just driving the car and preparing for my next track day. Going back to Hallett in September. With the improvements I made in my braking at OIR and the improvements I have made to my car/my driving overall, I am hoping to get a lap time below 1:40, for reference my best lap time last time was 1:41-1:42 approximately. I had to use timestamps from my gopro to estimate. This time I bought a legit lap timing device (Garmin Catalyst) since I have now been approved for solo.

I have switched back to E50 fuel/tune. Went to my favorite gas station ( they sell ethanol free 93 oct. and E85). When I tested the E85 was getting 62%, had to drive around and find another station, with the amount of fule I had in the tank there was no way I was going to get to E50 mix. Ended up filling up at a station that there e85 tested 70% and the 91 oct. tested 8%. I tested out the clutch with several High load/RPM pulls and quite a few flat foot shifts. It is holding the power, no slippage whatsoever is being detected. I am going to run E50 for a little while and enjoy it but I plan to go back to my 93 tune for my track day.
 
#37 ·
I have not done a lot to the car lately. Been driving it and enjoying it. I went back to my 93 tune in prep for my track day this weekend (no E85 available near the track). I really miss E50. Looking forward to getting back to Hallett, this time I will be attending with APEX Driving academy. I also signed up to go back to OIR in October. To make the most out of my upcoming track days I invested in a Garmin Catalyst. I feel like this should be a good way to see if I am improving and help me get better.

I removed the d-rings in the rear storage area for a little bit of weight reduction. I am splitting hairs here but again I never use these and never will use them so it is dead weight, might as well remove them and get a 0.43 lb reduction in overall weight.


I did install an AJT keyfob (the one for the Tundra/Tacoma LINK) I really like it. I only bought one since I was not 100% sure it would work. I weighed the before and after weight of the keyfob and it was identical so that is also a plus. I have some AJT keyfobs on my 4runner for years and they hold up well, I really like the quality of their products.


I also added a quadlock for securely mounting my phone for data logging purposes on track. I forgot to get a weight (will try and get one later on) I estimate it adds 0.20 lbs for now but will later on get and official weight addition. I do like this system, it keeps my phone secure and allows it to be in a position that I can run the ecutek app to data log and monitor some of the sensors with the dashboard.

 
  • Like
Reactions: Mr. Toad
#38 ·
I have not done a lot to the car lately. Been driving it and enjoying it. I went back to my 93 tune in prep for my track day this weekend (no E85 available near the track). I really miss E50. Looking forward to getting back to Hallett, this time I will be attending with APEX Driving academy. I also signed up to go back to OIR in October. To make the most out of my upcoming track days I invested in a Garmin Catalyst. I feel like this should be a good way to see if I am improving and help me get better.

I removed the d-rings in the rear storage area for a little bit of weight reduction. I am splitting hairs here but again I never use these and never will use them so it is dead weight, might as well remove them and get a 0.43 lb reduction in overall weight.

View attachment 30108 View attachment 30109 View attachment 30110 View attachment 30111

I did install an AJT keyfob (the one for the Tundra/Tacoma LINK) I really like it. I only bought one since I was not 100% sure it would work. I weighed the before and after weight of the keyfob and it was identical so that is also a plus. I have some AJT keyfobs on my 4runner for years and they hold up well, I really like the quality of their products.

View attachment 30102 View attachment 30103

I also added a quadlock for securely mounting my phone for data logging purposes on track. I forgot to get a weight (will try and get one later on) I estimate it adds 0.20 lbs for now but will later on get and official weight addition. I do like this system, it keeps my phone secure and allows it to be in a position that I can run the ecutek app to data log and monitor some of the sensors with the dashboard.

View attachment 30107
Have fun! I have heard great things about the Catalyst! Onboard GPS data is such a fantastic tool for learning as a driver. If the chance presents itself (and you're comfortable with it) have a pro driver or driving coach take your car out for some hot laps and then compare their data traces to yours to see where you can pick up speed.
 
#39 ·
I have been traveling a lot and not had time to post. I have quite a few updates to post, I am going to try and group them together here and then do a separate update on my previous two track days.

Review (Revemoto), Painted GR Corolla CE Hood, 1.5 out of 5 stars:
-Paint Quality 0 out of 5
-Customer Service 2 out of 5
-Paint match to OE color 5 out of 5


Do not buy from Revemoto. To start their customer service is complete crap. They claim OE or better quality paint. If you have had any Toyotas over the years then you know their paint is not a high bar. I have had this hood for less than 3 months (about 3500 miles and 2 track days; For comparison I have 0 chips on stock hood with 7500 miles and 3 track days) and the paint is chipping significantly in multiple regions. It is not cost effective to send this hood back for lifetime, I contacted them about a partial refund to use for local paint repair. It was difficult and took a lot of back and forth to get some money back (this was 2 weeks into owning the hood).

These are not rock chips, the paint is chipping in large chunks and delaminating from the base layer. See pictures, you can see either paint or primer where the chips are not bare metal. The simple fact is I wish I just bought an unpainted hood from Limit+1 and had a local shop paint it for me. Now I am out more money and I have to find a shop to have this hood repainted.

Image

Image
Image


SXTH Turbo Inlet pipe, 3 out of 5 Stars:
-Quality 4 out of 5
-Customer Service 4 out of 5


The install is a bit of a pain. The overall build quality is good. My gripe with this product is the seal material spec'd for the turbo Inlet adapter. I was doing a pre-track day inspection and saw this:

Image


I thought I had mis-installed the inlet adapter and pinched the seal. Upon disassembly I realized it had melted and that I had seen some seal material that had oozed out from between the two surfaces. My concern is the potential for hot melted rubber to be sucked into the turbo.

Image


This is clearly not a high temp seal and has melted with about 3,500 miles of driving. They do not sell a replacement and their recommendation is to buy one at the hardware store. The stock toyota seal is high temp, I compared it and it has no deformation with 7,500 miles of use. I am going to try to source a high temp seal to replace the melted seal. Iwent back to my stock one temporarily for my track event. I did notice that Intake manifold temps have dropped with the stock one. This leads me to believe that the Aluminum one is heatsoaking more than the stock plastic unit. If I do reinstall I will probably wrap it with the gold foil tape to reduce heat transfer.
 
#40 · (Edited)
Track day download:

To start I have new information on the AWD shutdown/Overheat. I have finally hit a true shut down at Ozarks International Raceway this past weekend (I think everytime I got the message previously it was the warning not the official shut down). I have thought it shut down on me multiple times in the past but I never noticed any difference in handling. At OIR I got the message then half a lap later the message changed and the car became nearly impossible to drive under hard throttle. The rear end became Loose under throttle (thought this was unusual but another GRC owner at the track had the same experience). My theory is that it was unable to transfer enough weight to rear end to get rear traction.

Before these track days I changed the engine oil to 5w-30.

Hallett, September 21-22, 2024, Apex Driving Academy:

This was a hot we hit mid to high 90s on the first day and then got some rain on the second day. It was fun to learn the wet line a bit at hallett. On the first day I hit the AWD overheat (at least what I thought was the overheat) every session usually within 2 laps of the end. I got a new PR at the track during the second session of the day at 1:35.72 (was previously aprox. 1:41). From there I got progressively slower. I believe this was in part do to my instructor. He was teaching me a line I did not feel comfortable with that was difficult for me and my car to hit consistently. He was a good driver, he just was less familiar with the track than my previous instructor (in June).


Day 2 was fun. I was nervous with the potential for rain. During the 2nd session it started as a light sprinkle and by halfway through it was a fairly decent rain and the track got progressively slicker. This was a fun session and the only session I have ever had at Hallett without triggering any AWD overheat messages.


Here is a link to the full playlist of all the videos I have from Hallett in September.

Ozarks International Raceway, October 19-20, 2024, NASA:

The temps overall for the weekend were 50-60s in morning with afternoon sessions being 85-90. I had a great time. My PR from my previous event here in July was 3:42 and my goal was to break 3:30. Which I did almost immediately. On the first day my fastest lap was 3:07.10 in my 2nd session. I triggered the AWD overheat once and it was in session 3. About half a lap after the message (that I thought was the overheat) the message changed and the car became undriveable. It started oversteering realy bad on track out.


Day 2 was the most fun of the event. Session 2 I was chasing behind an Camaro SS and doing 3:08 - 3:09 laps, this was crazy fun. He was faster than me in some spots and I was faster than him in others. Specifically turn 2 to the entry of turn 4 and turn 8 to turn 11. Towards the end of this session I hit the overheat again and half a lap later I experienced the same handling issues.


In session 3 I set my PR for the weekend at 3:03.62 after speaking to another much faster GRC driver I change my driving a bit in this session. I was following behind the instructor (who was another GRC owner that was much faster than me). No overheats in this session but my brakes did get soft going into turn 16 on my PR lap. I had to back off a bit and I think I lost about a second. No AWD overheat in this session or session 4. It should also be noted that the Camaro I was chasing in session 2 set his PR for the weekend in session 3, I believe he said it was a 2:58.


Here is the full playlist of all the videos I have from OIR. Overall this was a fun event, I want to maybe get a few more track events on this car and try and see if I can alter my driving a bit to reduce AWD overheat instances. My front brakes are (track pads) are almost worn out with 3 track events on them so they will need to be replaced soon.
 
#42 ·
Track day download:

To start I have new information on the AWD shutdown/Overheat. I have finally hit a true shut down at Ozarks International Raceway this past weekend (I think everytime I got the message previously it was the warning not the official shut down). I have thought it shut down on me multiple times in the past but I never noticed any difference in handling. At OIR I got the message then half a lap later the message changed and the car became nearly impossible to drive under hard throttle. The rear end became Loose under throttle (thought this was unusual but another GRC owner at the track had the same experience). My theory is that it was unable to transfer enough weight to rear end to get rear traction.

Before these track days I changed the engine oil to 5w-30.

Hallett, September 21-22, 2024, Apex Driving Academy:

This was a hot we hit mid to high 90s on the first day and then got some rain on the second day. It was fun to learn the wet line a bit at hallett. On the first day I hit the AWD overheat (at least what I thought was the overheat) every session usually within 2 laps of the end. I got a new PR at the track during the second session of the day at 1:35.72 (was previously aprox. 1:41). From there I got progressively slower. I believe this was in part do to my instructor. He was teaching me a line I did not feel comfortable with that was difficult for me and my car to hit consistently. He was a good driver, he just was less familiar with the track than my previous instructor (in June).


Day 2 was fun. I was nervous with the potential for rain. During the 2nd session it started as a light sprinkle and by halfway through it was a fairly decent rain and the track got progressively slicker. This was a fun session and the only session I have ever had at Hallett without triggering any AWD overheat messages.

Here is a link to the full playlist of all the videos I have from Hallett in September.

Still working on this post and will add more later on...
Thanks for this update. I believe I saw some posts/threads on this site (from SavageGeese perhaps??) that seems to point to a software issue as opposed to an actual temperature-based shutdown. Has anyone heard any updates on whether this issue is fixable through the aftermarket?
 
#43 ·
Thanks for the heads up about Revemoto, been interested in getting a CE hood once this winter season ends. Will definitely cross them off my list to check out. Appreciate your posts man always detailed (y)
I am really disappointed with the quality. I wasn't going to post about it initially but after finding quiet a few more chips I decided I wanted to make an online post somewhere to document my issues. The lifetime paint warranty they offer is a gimmick, it is not cost effective to do unless you live near their facility in Houston.

Thanks for this update. I believe I saw some posts/threads on this site (from SavageGeese perhaps??) that seems to point to a software issue as opposed to an actual temperature-based shutdown. Has anyone heard any updates on whether this issue is fixable through the aftermarket?
I liked that video, Im glad it seems that they are narrowing down the issue. I am sure Graham and Ecutek have already come to a similar theory as mine. I posted my thoughts on the issue here.